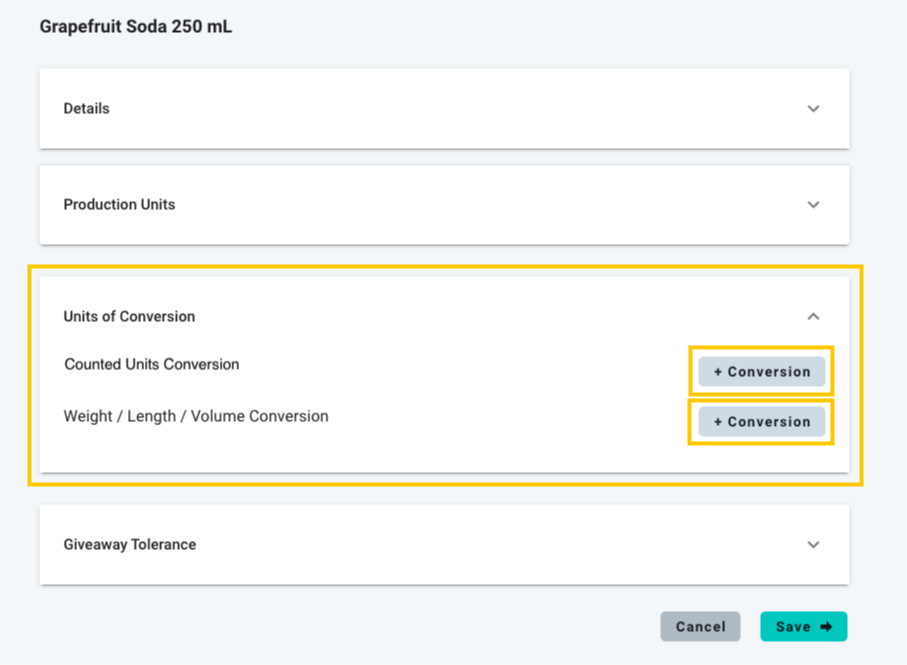
Units of Conversion
During production, a product passes through various equipment, each producing different unit types.
For example:
In the Worximity bottling factory, the Grapefruit Soda production starts at equipment 1, the filler, where the bottles are produced. The bottles then move to equipment 2, where they are placed into cases. These cases are packed into boxes on equipment 3 and finally wrapped and palletized on equipment 4.

Different units matter to different roles, operators may focus on produced boxes, while logistics on shipped pallets, and directors on hectoliters.
To display quantities, rates, or rejects in suitable units, configure your products with various unit conversions, following this video or following the step by step process below.
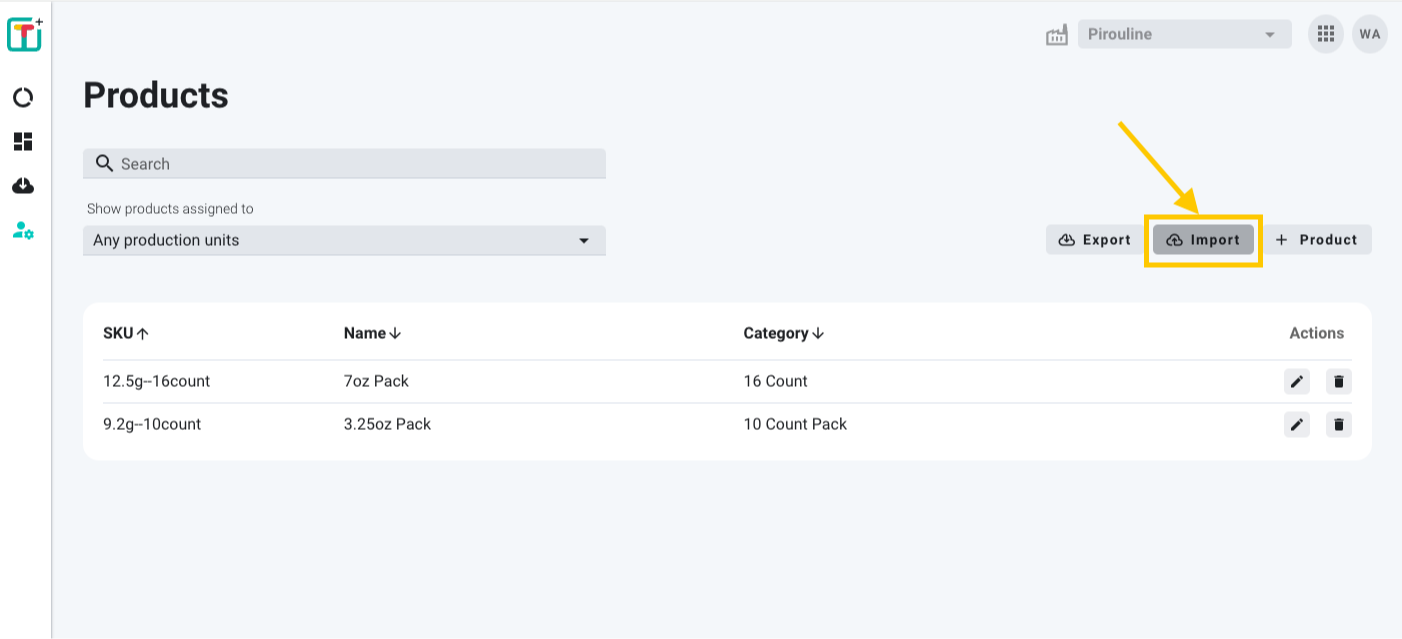
1. Open the Product's page
At the Admin menu click at the Products option, it will open the products page. Then select the product that you would like to configure into different units.

Once in the specific product page, click at the Units of Conversion section, you will notice that Tile+ has two types of Conversions, one for Units in terms of counts, named Counted Units Conversion, and another, for standardized measurements, such as Weight/ Length/ Volume.
A. Counted Units Conversion
Refers to all the different items that can be counted in a production line, Example: Bottles, cases, pallets, etc.
B. Weight/Length/ Volume Conversion
All the standardized measurement units coming from the metric system or the imperial system.
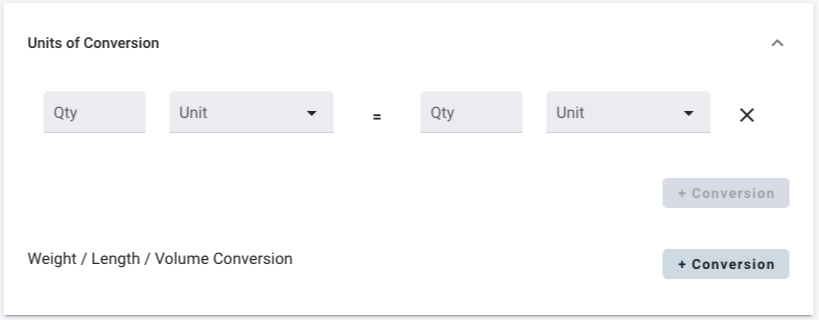
2. Create Counted Units Conversion
Click on the "+ Conversion" located at the same row of the Counted Units Conversion.
A first row will appear to create the first conversion.
You can create as many Counted Unit Conversions as you want, BUT they will have to FOLLOW A CHAIN ORDER, meaning whatever was chosen in the first conversion row will follow the next one.
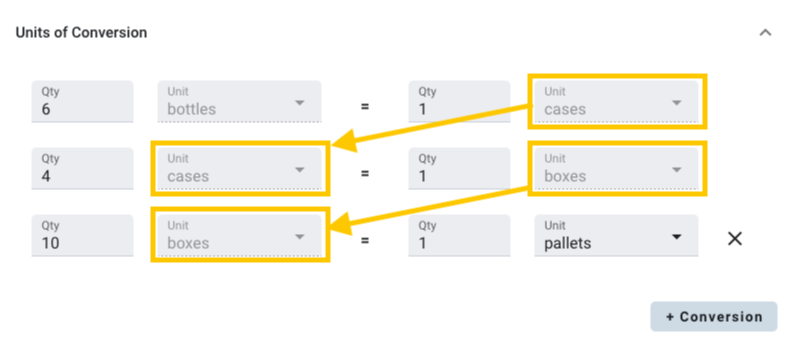
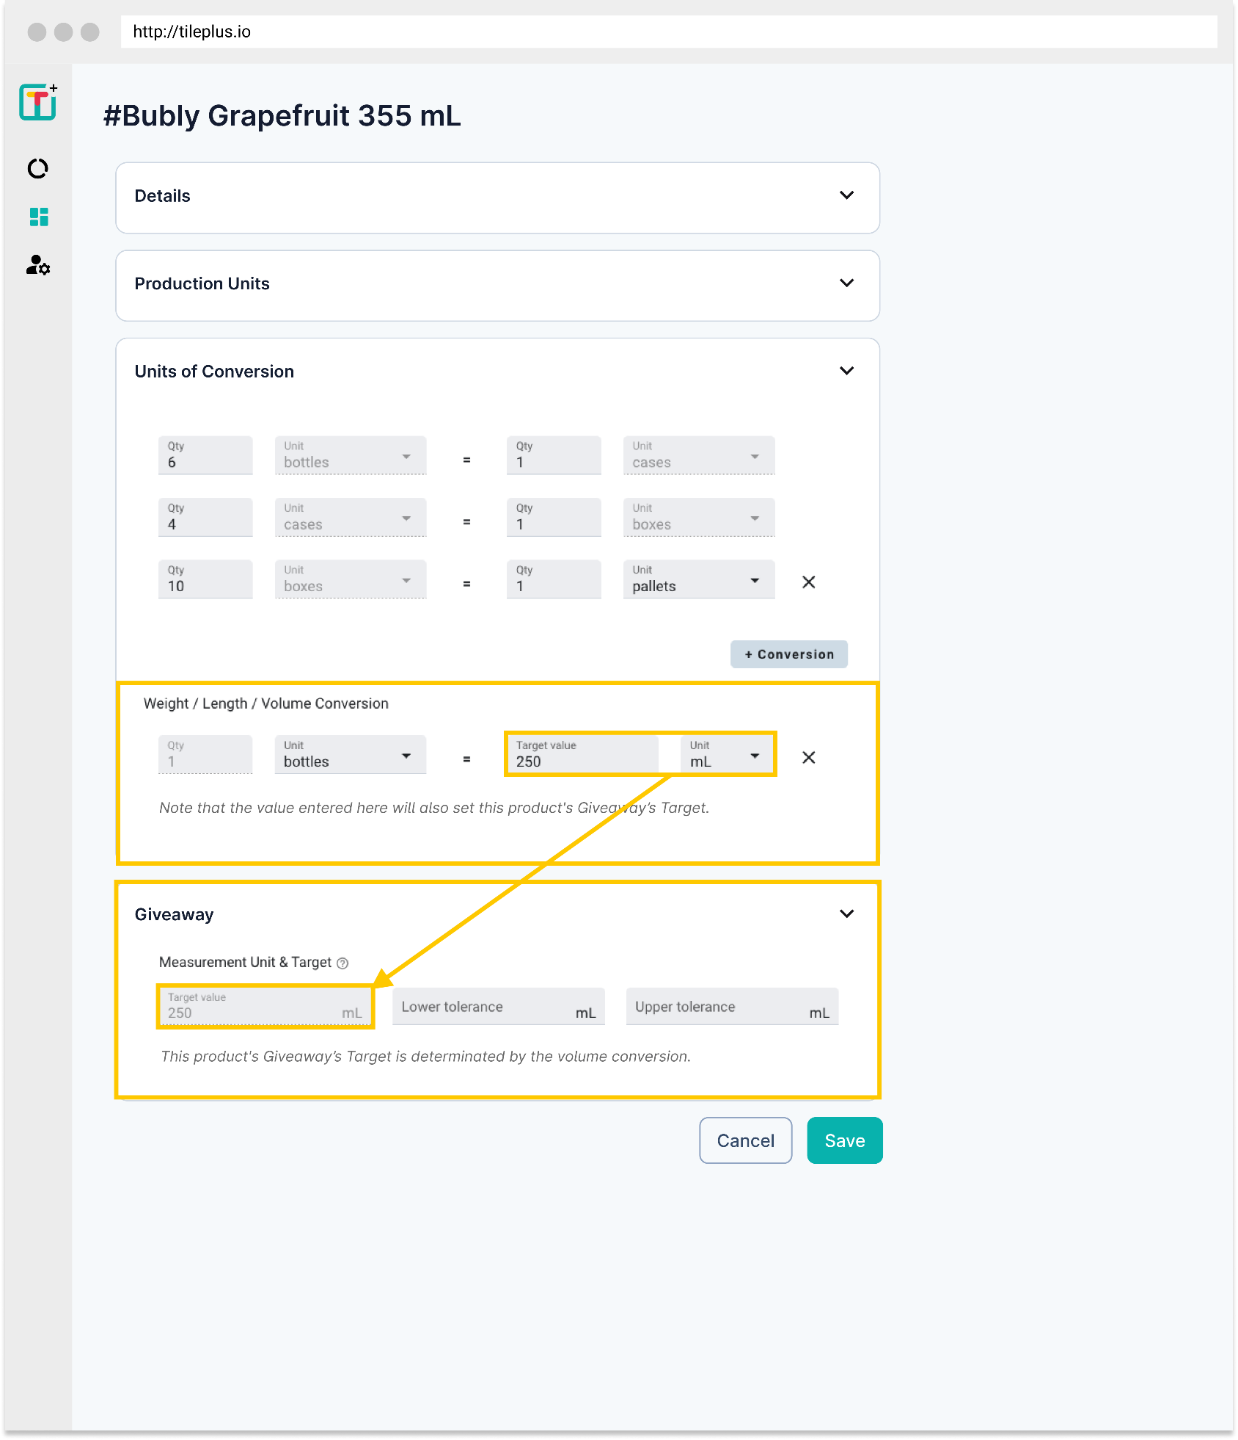
Ex.: In this example 6 bottles are equivalent to a case. Then 4 cases is equivalent to a box and 10 boxes is equivalent to a pallet.
3. Create a Weight / Length / Volume conversion
Click on the "+ Conversion" located at the same row of the Weight/ Length/ Volume Conversion.
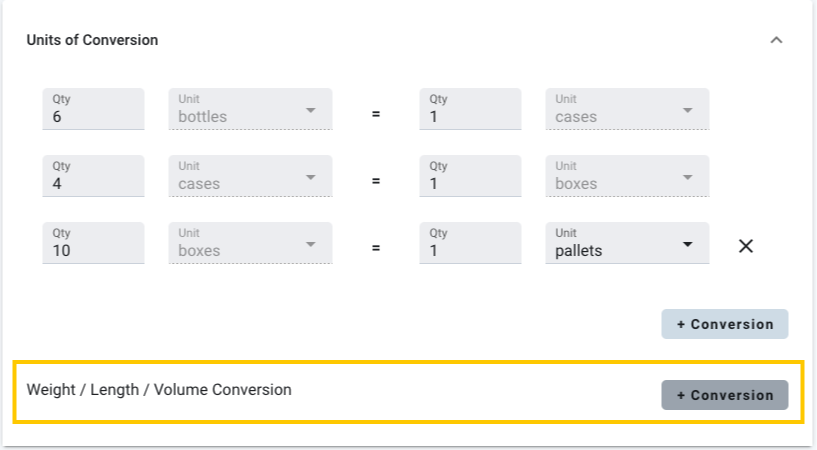
This conversion will use the "Base Unit" designated at the Equipment(s),AKA Production Unit(s), that run that specific product.

Note that at this time Tile+ only supports ONE Length or Volume or weight conversions at a time.
4. If the Product has Giveaway metrics
Take into count that if you enter a Weight or Volume conversion that value will be taken also for that product's Giveaway Target weight.
Display the Configured units at the Line Dashboard
5. Select the Units for the KPIs
Once your products are configured, you can simply select from the menu the type of unit you would like to see your different KPIs, such as Rate, Speed, Quantities or Rejects.
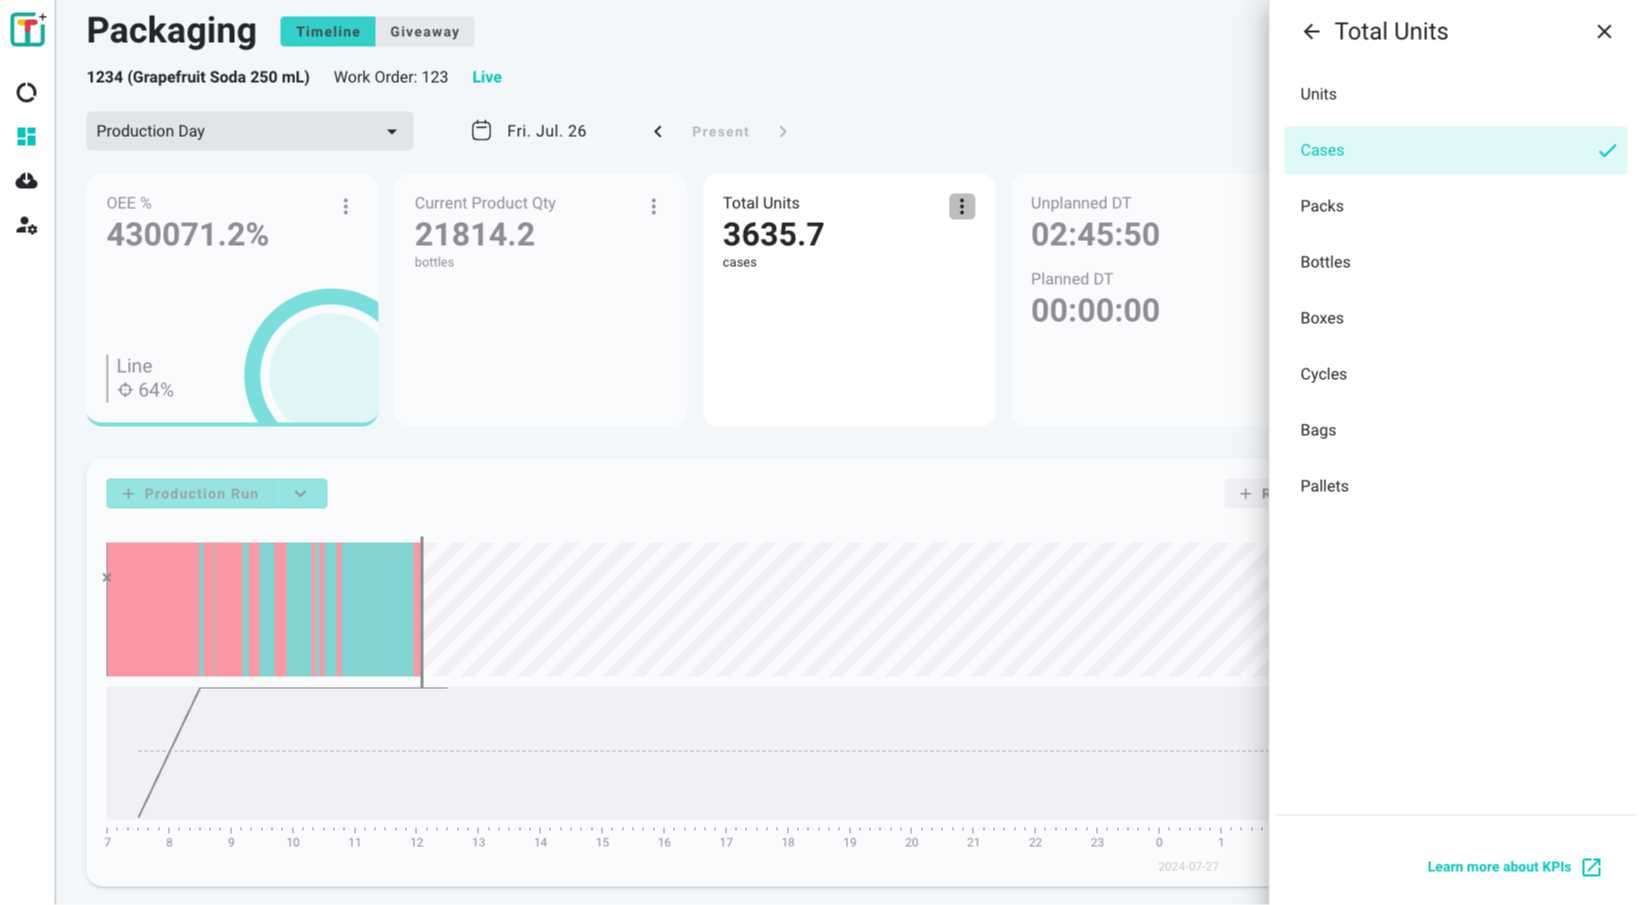
Note that if you select a unit and your product hasn't a conversion for that unit, the tile won't display values, only a Dash line will appear.

Bulk conversion with Excel File
1. From the Products Page
Click on the Export button located at the top right of the Product's page to get an Excel File with all your products details, this file its going to help your conversions for each SKU quicker for all your products.

2. Excel File
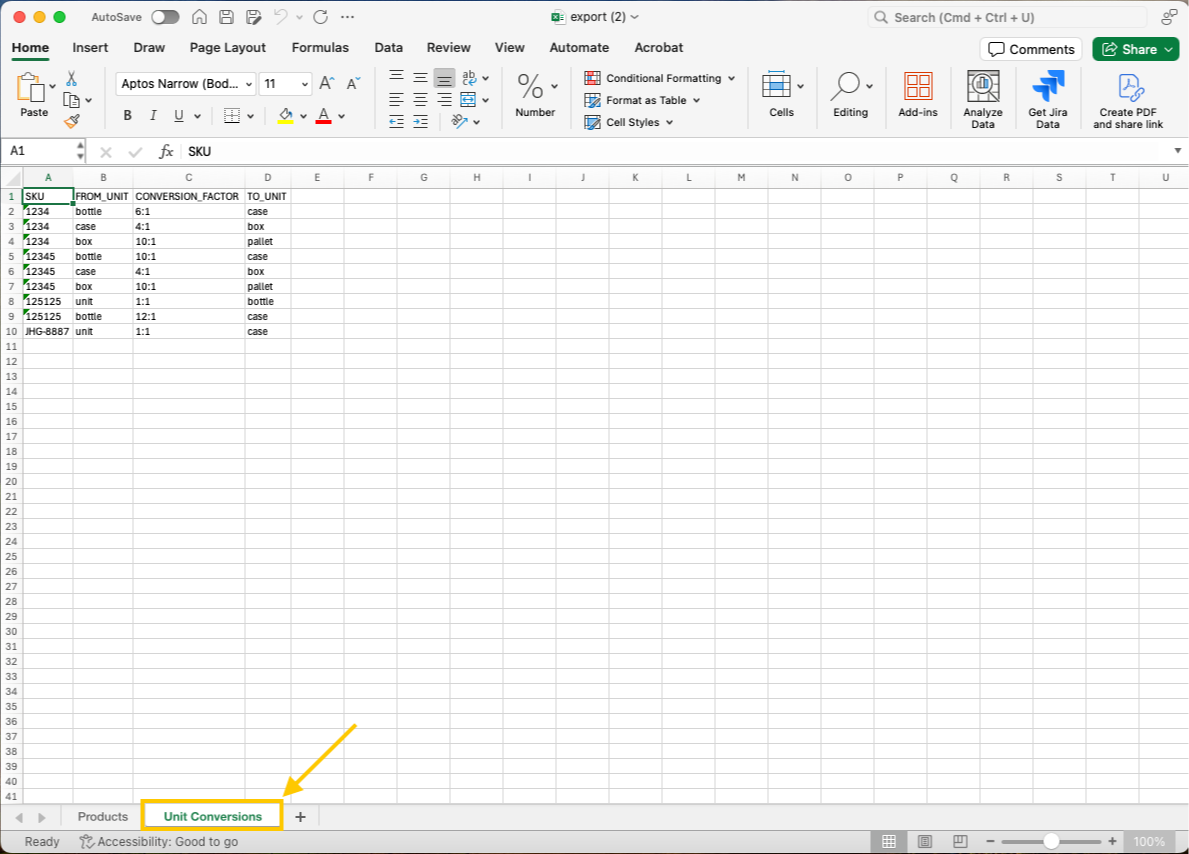
Once you have opened your Excel File you will see a Sheet call "Unit Conversions".
If you had already created conversion for any of your SKUs at the Tile+ Product page, they will appear her as it is the case in this example.
3. Adding conversions
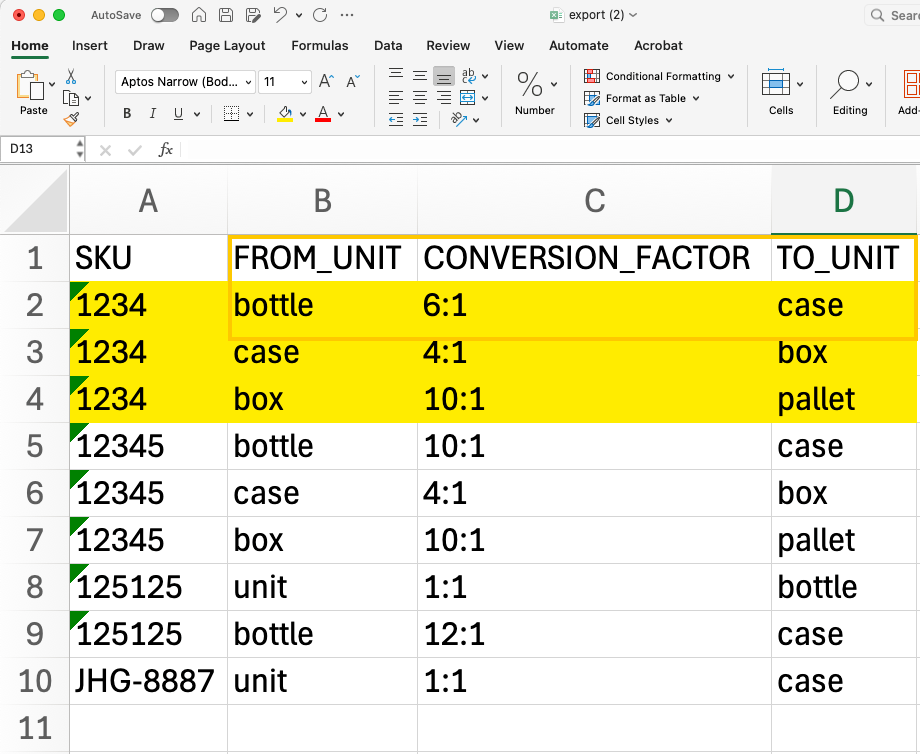
In this Example the SKU 1234 has 4 unit conversions. For bottles, cases, boxes and pallets.
Each column need to be fill out:
FROM_UNIT: bottle
CONVERSION FACTOR: 6:1.
Meaning 6 bottles is equivalent to 1 case, in this example, but it could be any other unit, as it is the case in the conversions below that one.
IMPORTANT NOTE
While filling the Conversions DO NOT LET ANY SPACE between the numbres and the ":", Otherwise it will cause an error when you upload the file to Tile+.
6: 1 = Error
6 : 1 = Error
6 :1 = Error
Make sure you add a row for EACH conversion, beginning with the SKU number, From Unit, Conversion Factor and To-Unit.
4. Import the Excel File
After creating the conversions for all your SKUs, upload your Excel file on the Products page in Tile+.
Once the file is successfully uploaded, you will be able to select any configured unit to display the units' KPIs.
FAQ
